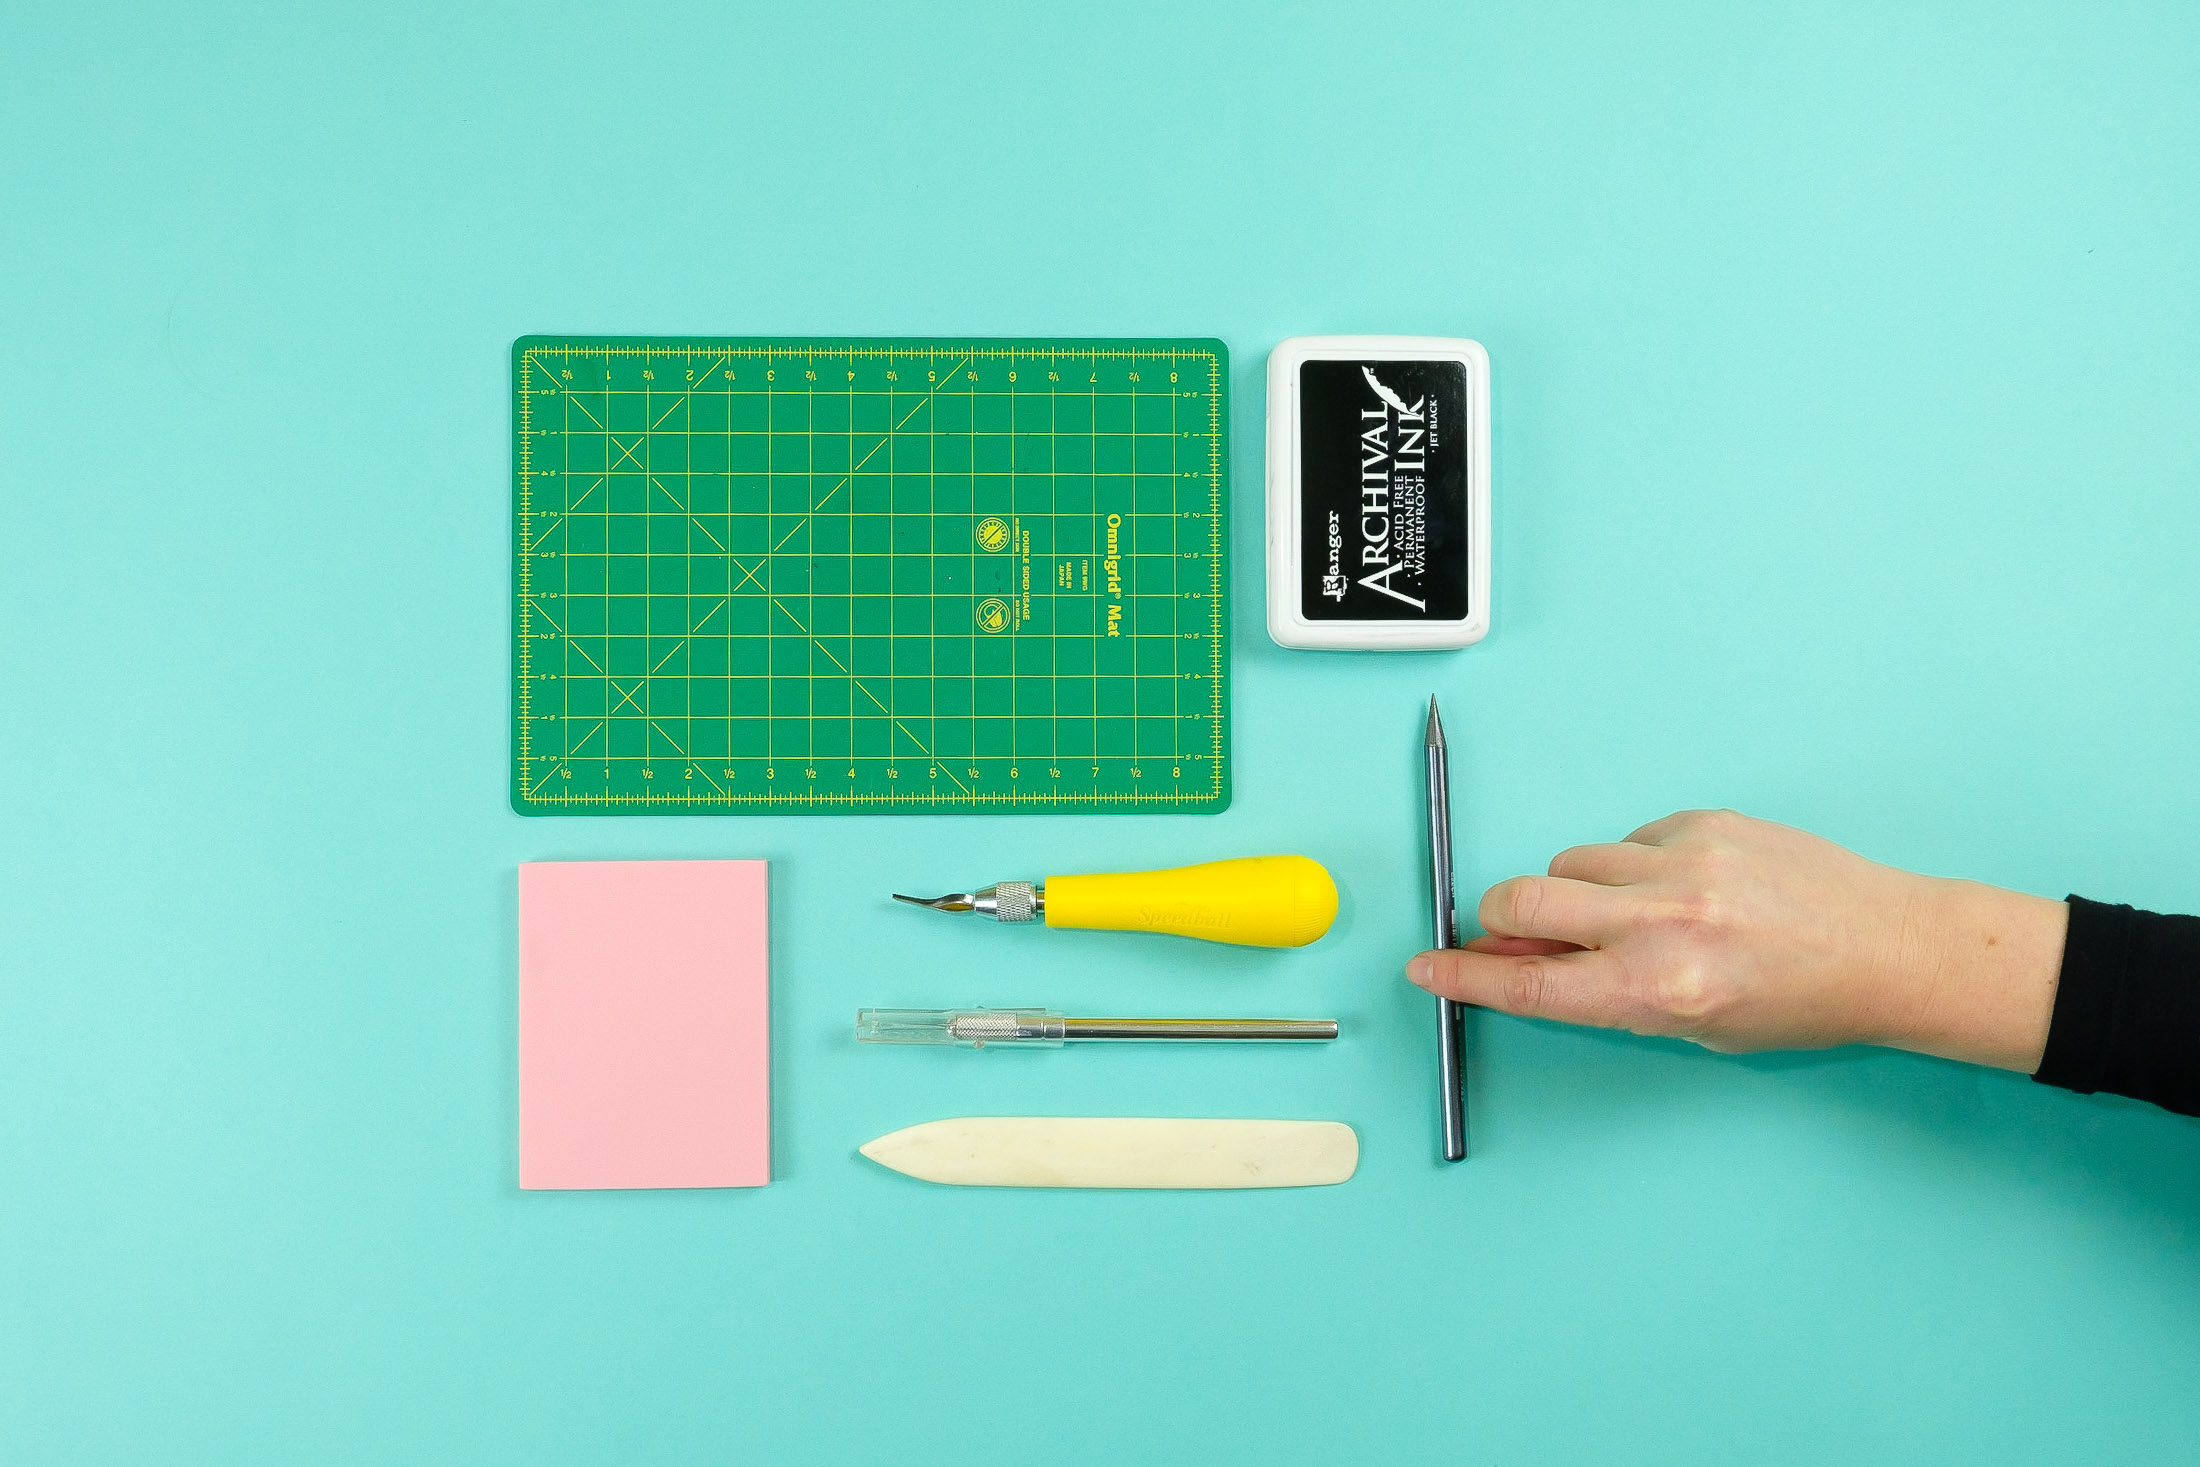
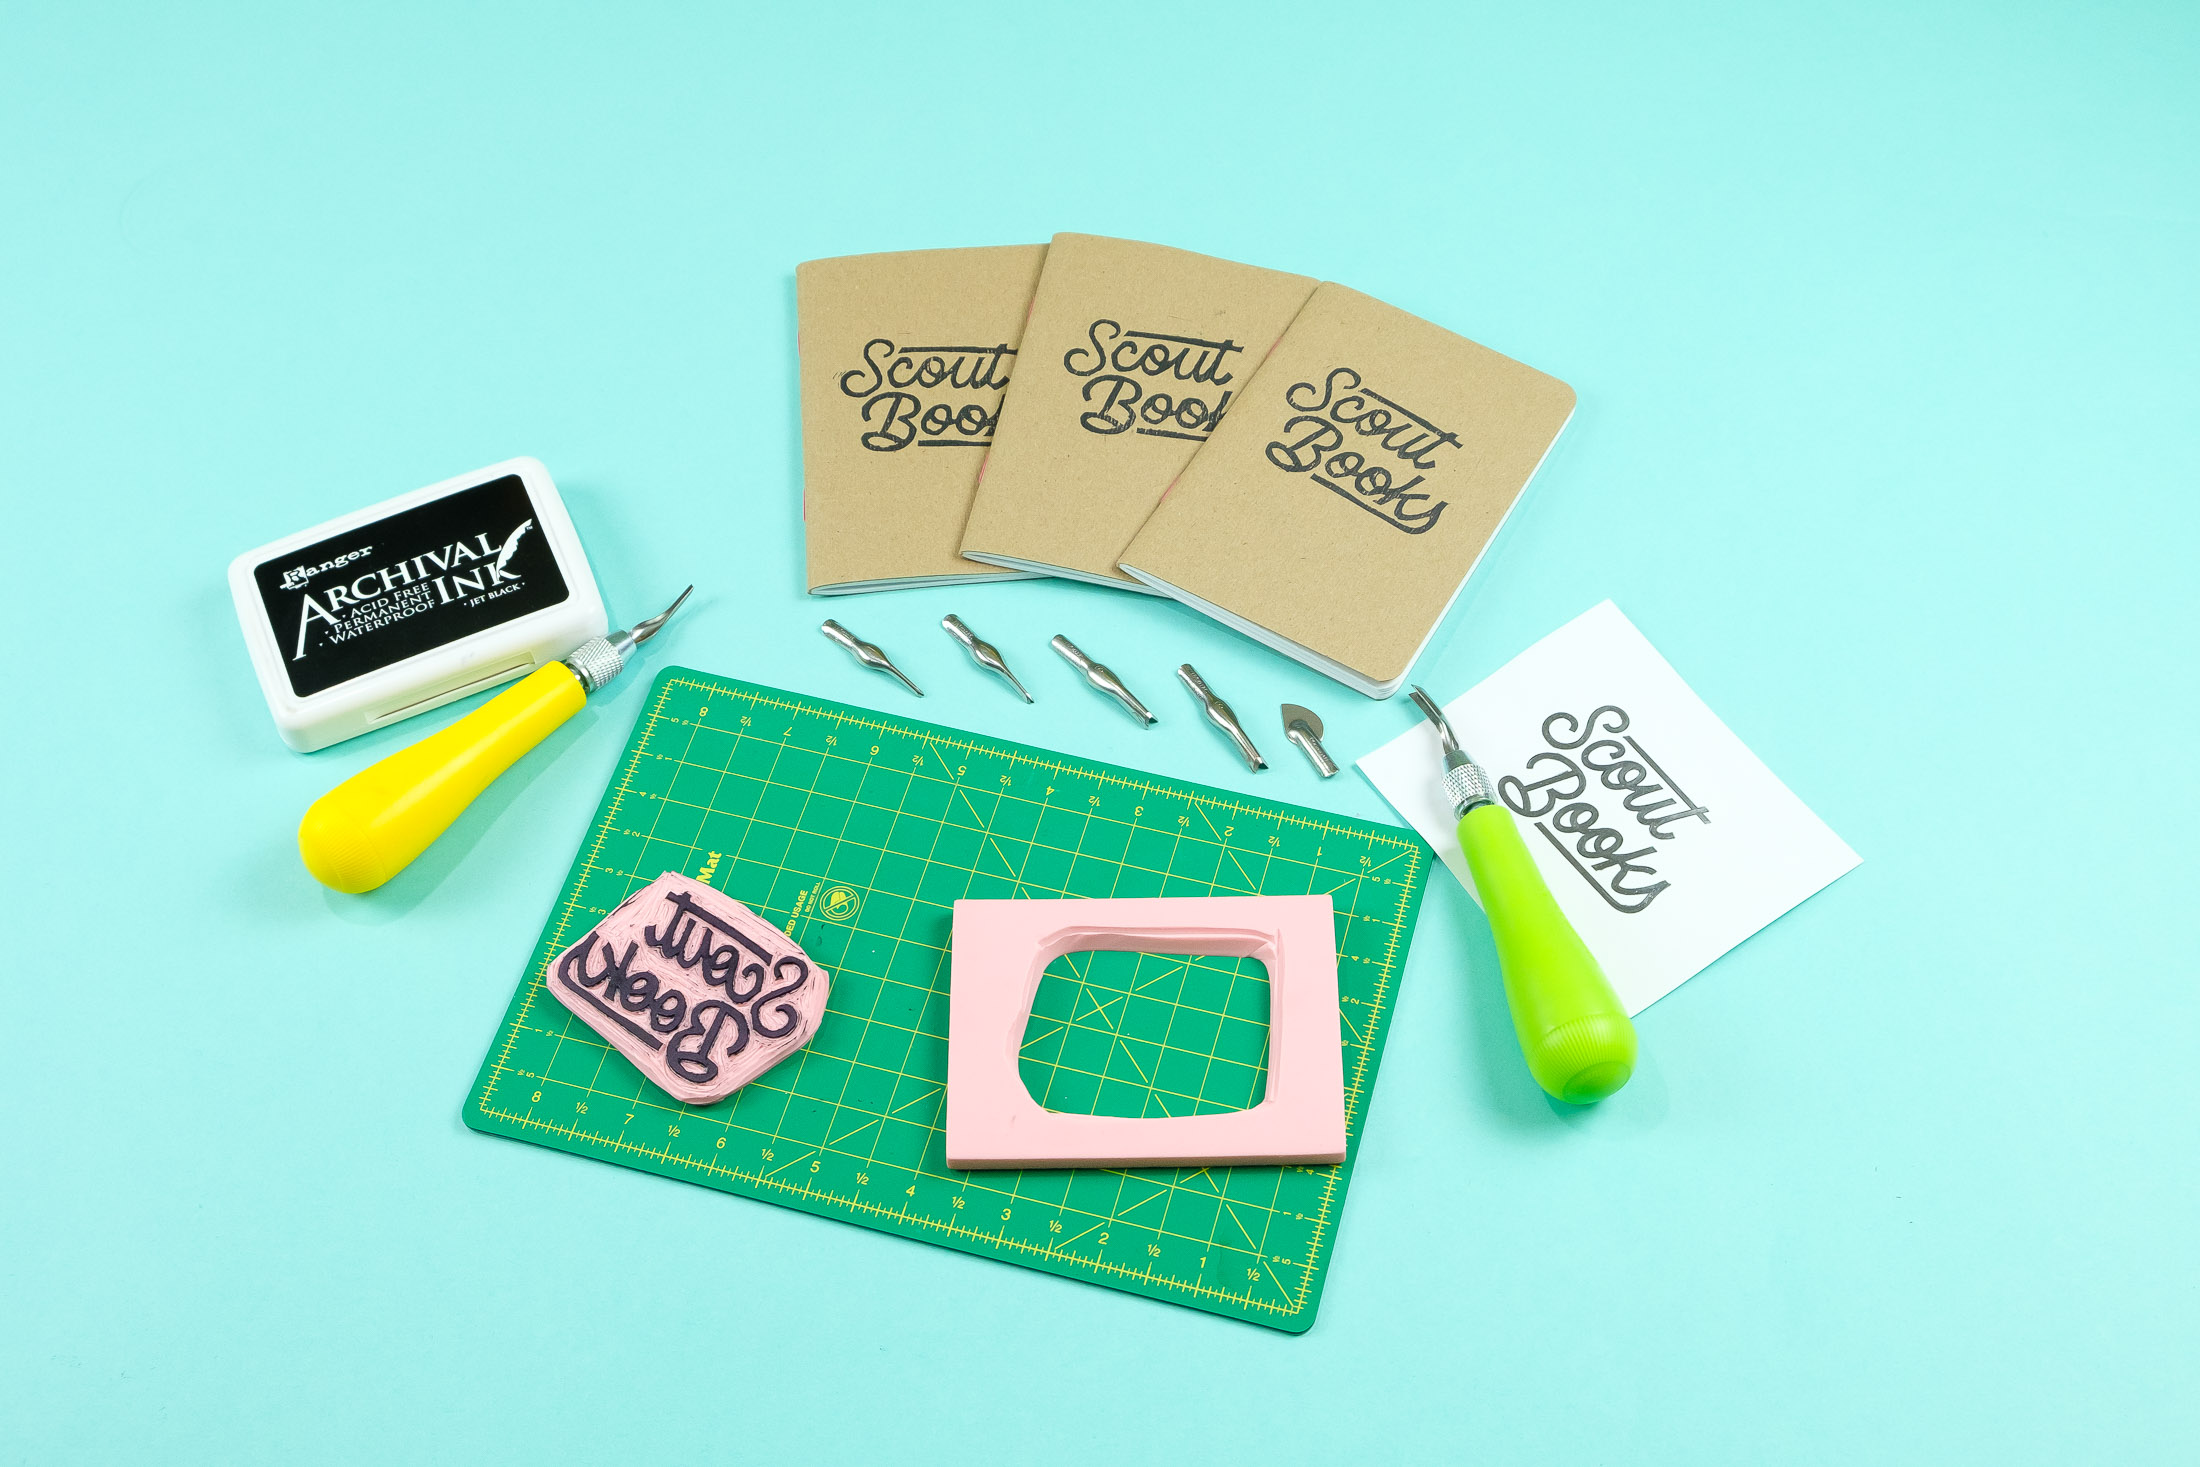
Stamp-making (also called linocutting) is a fantastic way to make your own prints for both beginners and advanced printmakers alike. Even if you don’t consider yourself talented at drawing, you can use a photocopy to create your print, which makes this one of the most accessible forms of printmaking around. Ready to get started? Here’s a list of the tools you’ll need. Most of these can be had at your local craft supply store or online for very reasonable prices. Check out this great tool from Etsy to shop at local sellers and support your local economy!
- Linoleum carving tool with (multiple heads)
- Linoleum carving material
- Graphite pencil for making your impression
- Utility knife for cutting away excess stamp material
- A bone folder for the transfer (a ruler will work in a pinch)
- Paper large enough to cover your image
- Ink pad or rubber brayer and palette to transfer ink to your stamp
Once you’ve got your supplies all ready and setup, it’s time to select your artwork make your first impression!
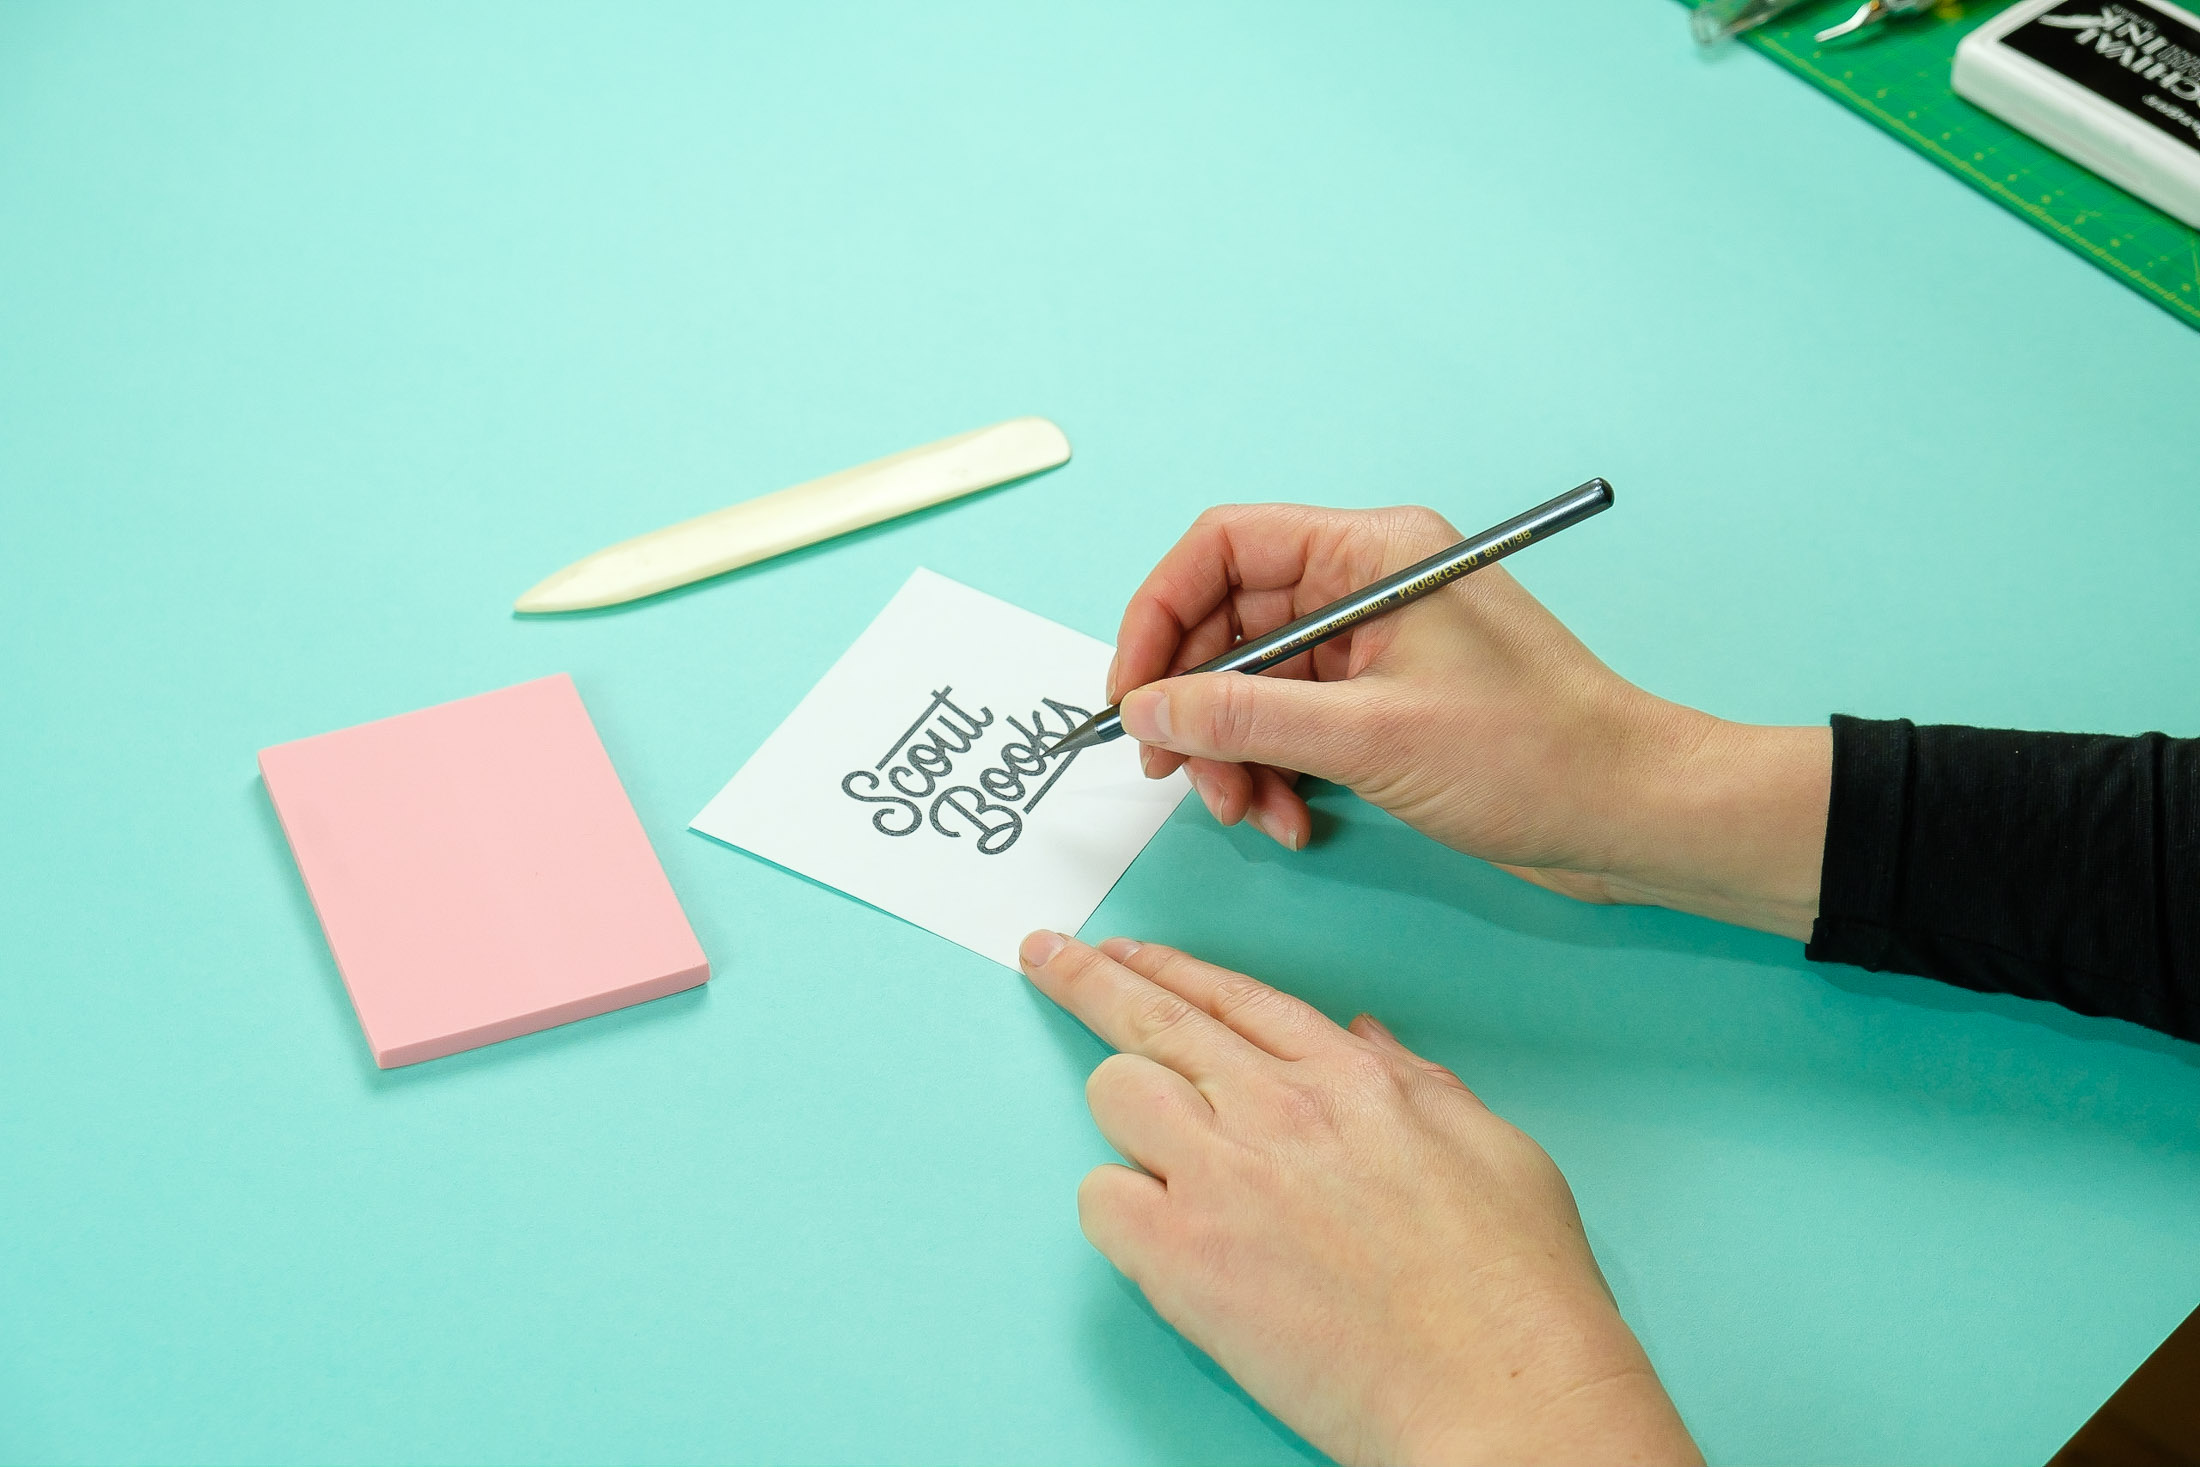
You can use just about anything for your reference image, from a photograph to something you’ve drawn entirely on your own. Just keep in mind that the more detail in your original image, the more challenging it will be to cut out and get a good print from. Because of this, many block prints are bolder than in other forms of printmaking, but it is still possible to get fine detail with a careful hand and an absorbent surface to print on. We went with the Scout Books script logo to put on the cover of some DIY notebooks. We like to transfer the image from paper onto the stamp. If you decide to draw directly onto the stamp, remember that you will need to create a reverse image of what you will be stamping!
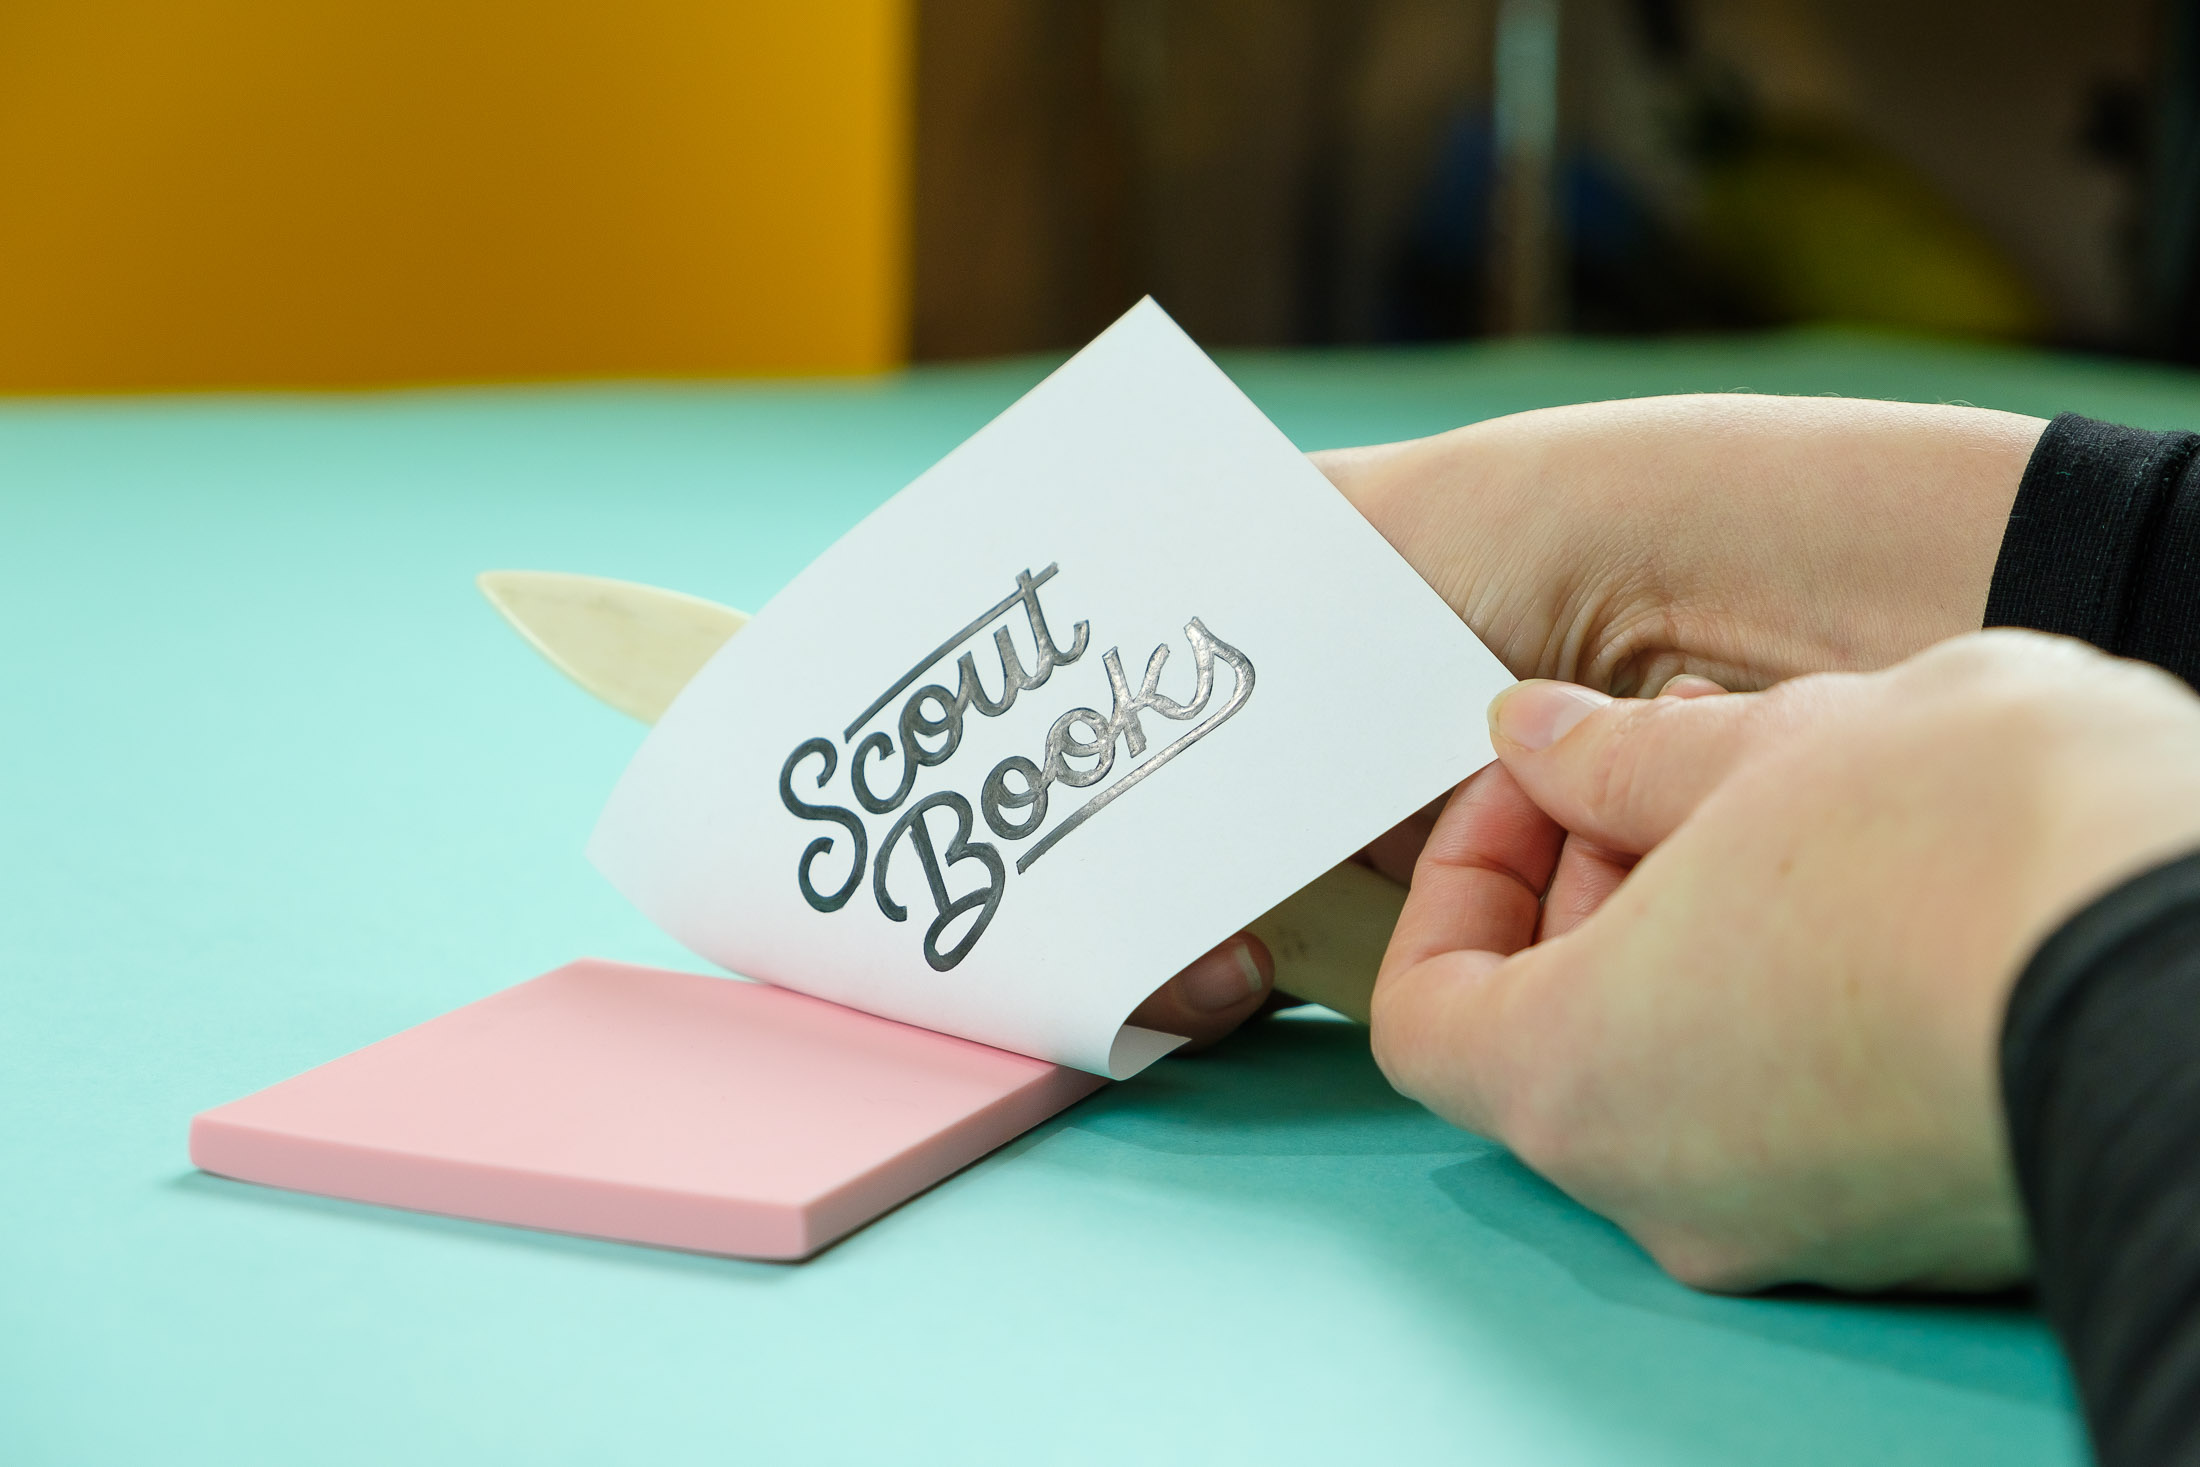
The trick to getting a good transfer is to cover the paper with plenty of graphite from the pencil. Start with a sharp pencil and apply enough pressure so that the transfer will come out clearly. Once you’ve got that nice and drawn in, it’s time to transfer the image from your paper to the stamp material! Flip it over and keep it in place while sliding your bolder across the paper while applying pressure.
Now is the really fun part where you get to carve out what will become your stamp! At this time, you still have two options for how your stamp will turn out, either as a negative where your image will be surrounded by ink, or as a positive where only the detail of the image will be covered in ink. Choosing which one you’d like to use will largely depend on your design and how you’re using it on your material. It’s great to play around with these options as they can create for some very interesting prints, and one of the ways block printing is so dynamic! If you’re working from a reference image, you can use both methods and create interesting patterns, so the options are truly endless.
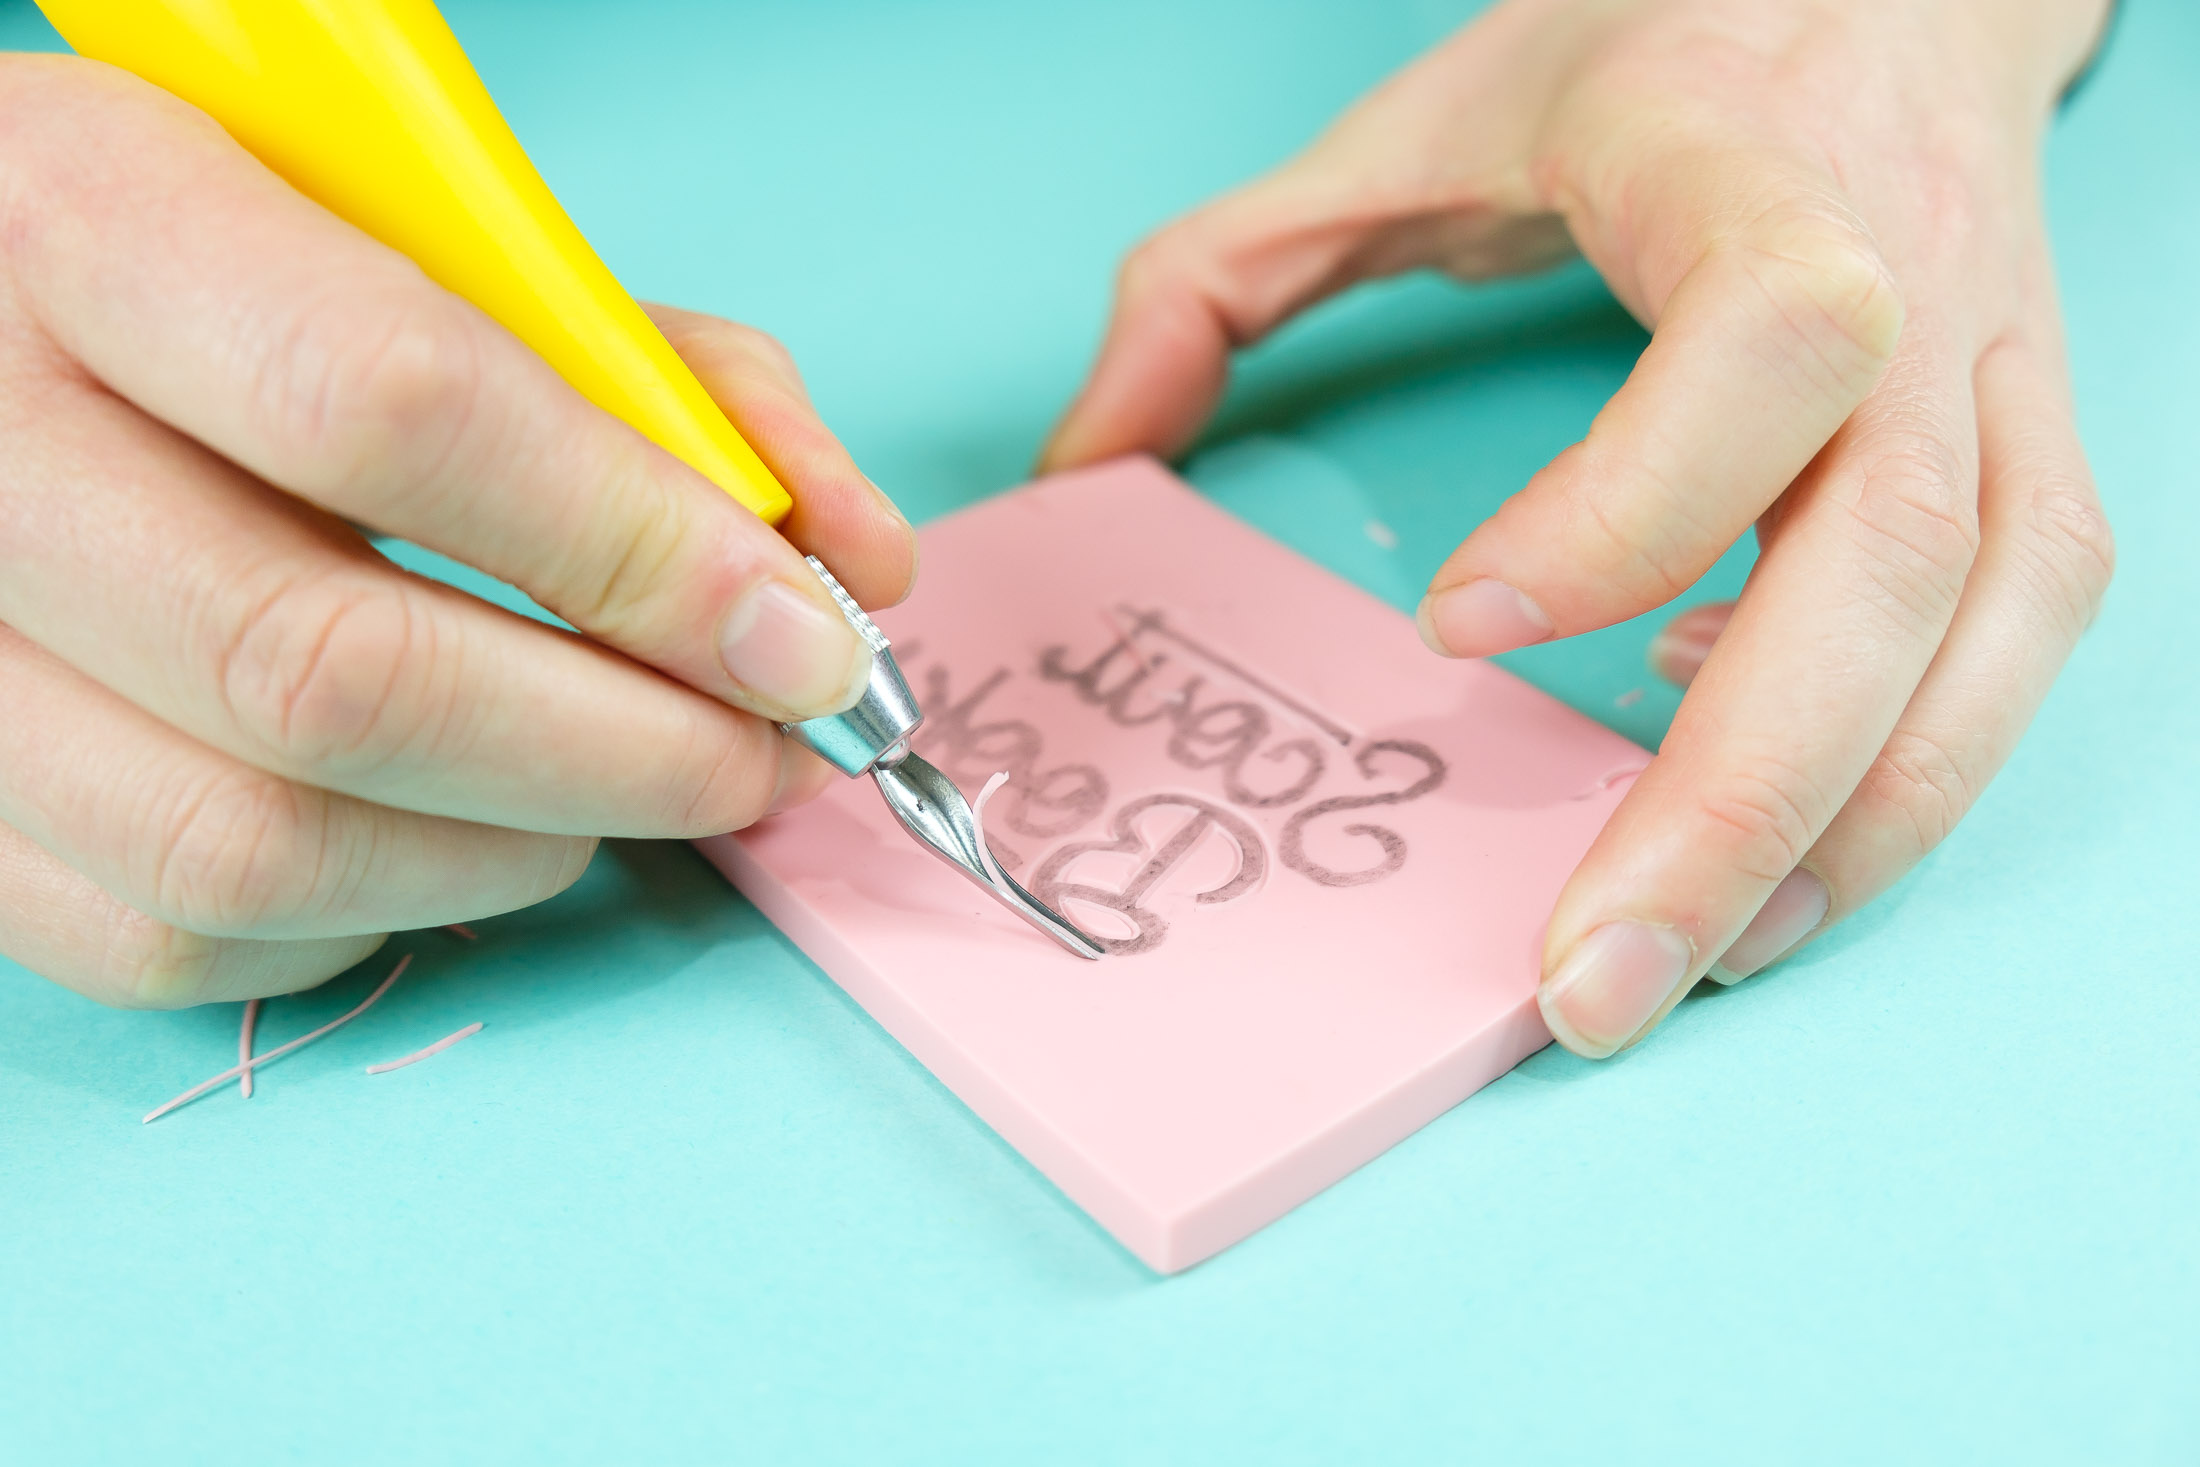
There are different approaches to this step, but our preferred way is to carve an outline of your image with the fine point on your carving tool first. Then, once you’ve created an outline around your image, you can carve away at the larger portions without fear of damaging the detail on your stamp.
Once you’ve got that outline, go ahead and carve away at the background. With practice, you’ll be able to learn how much pressure to apply, the best tips for particular designs, and be able to create more intricate stamps to print with.
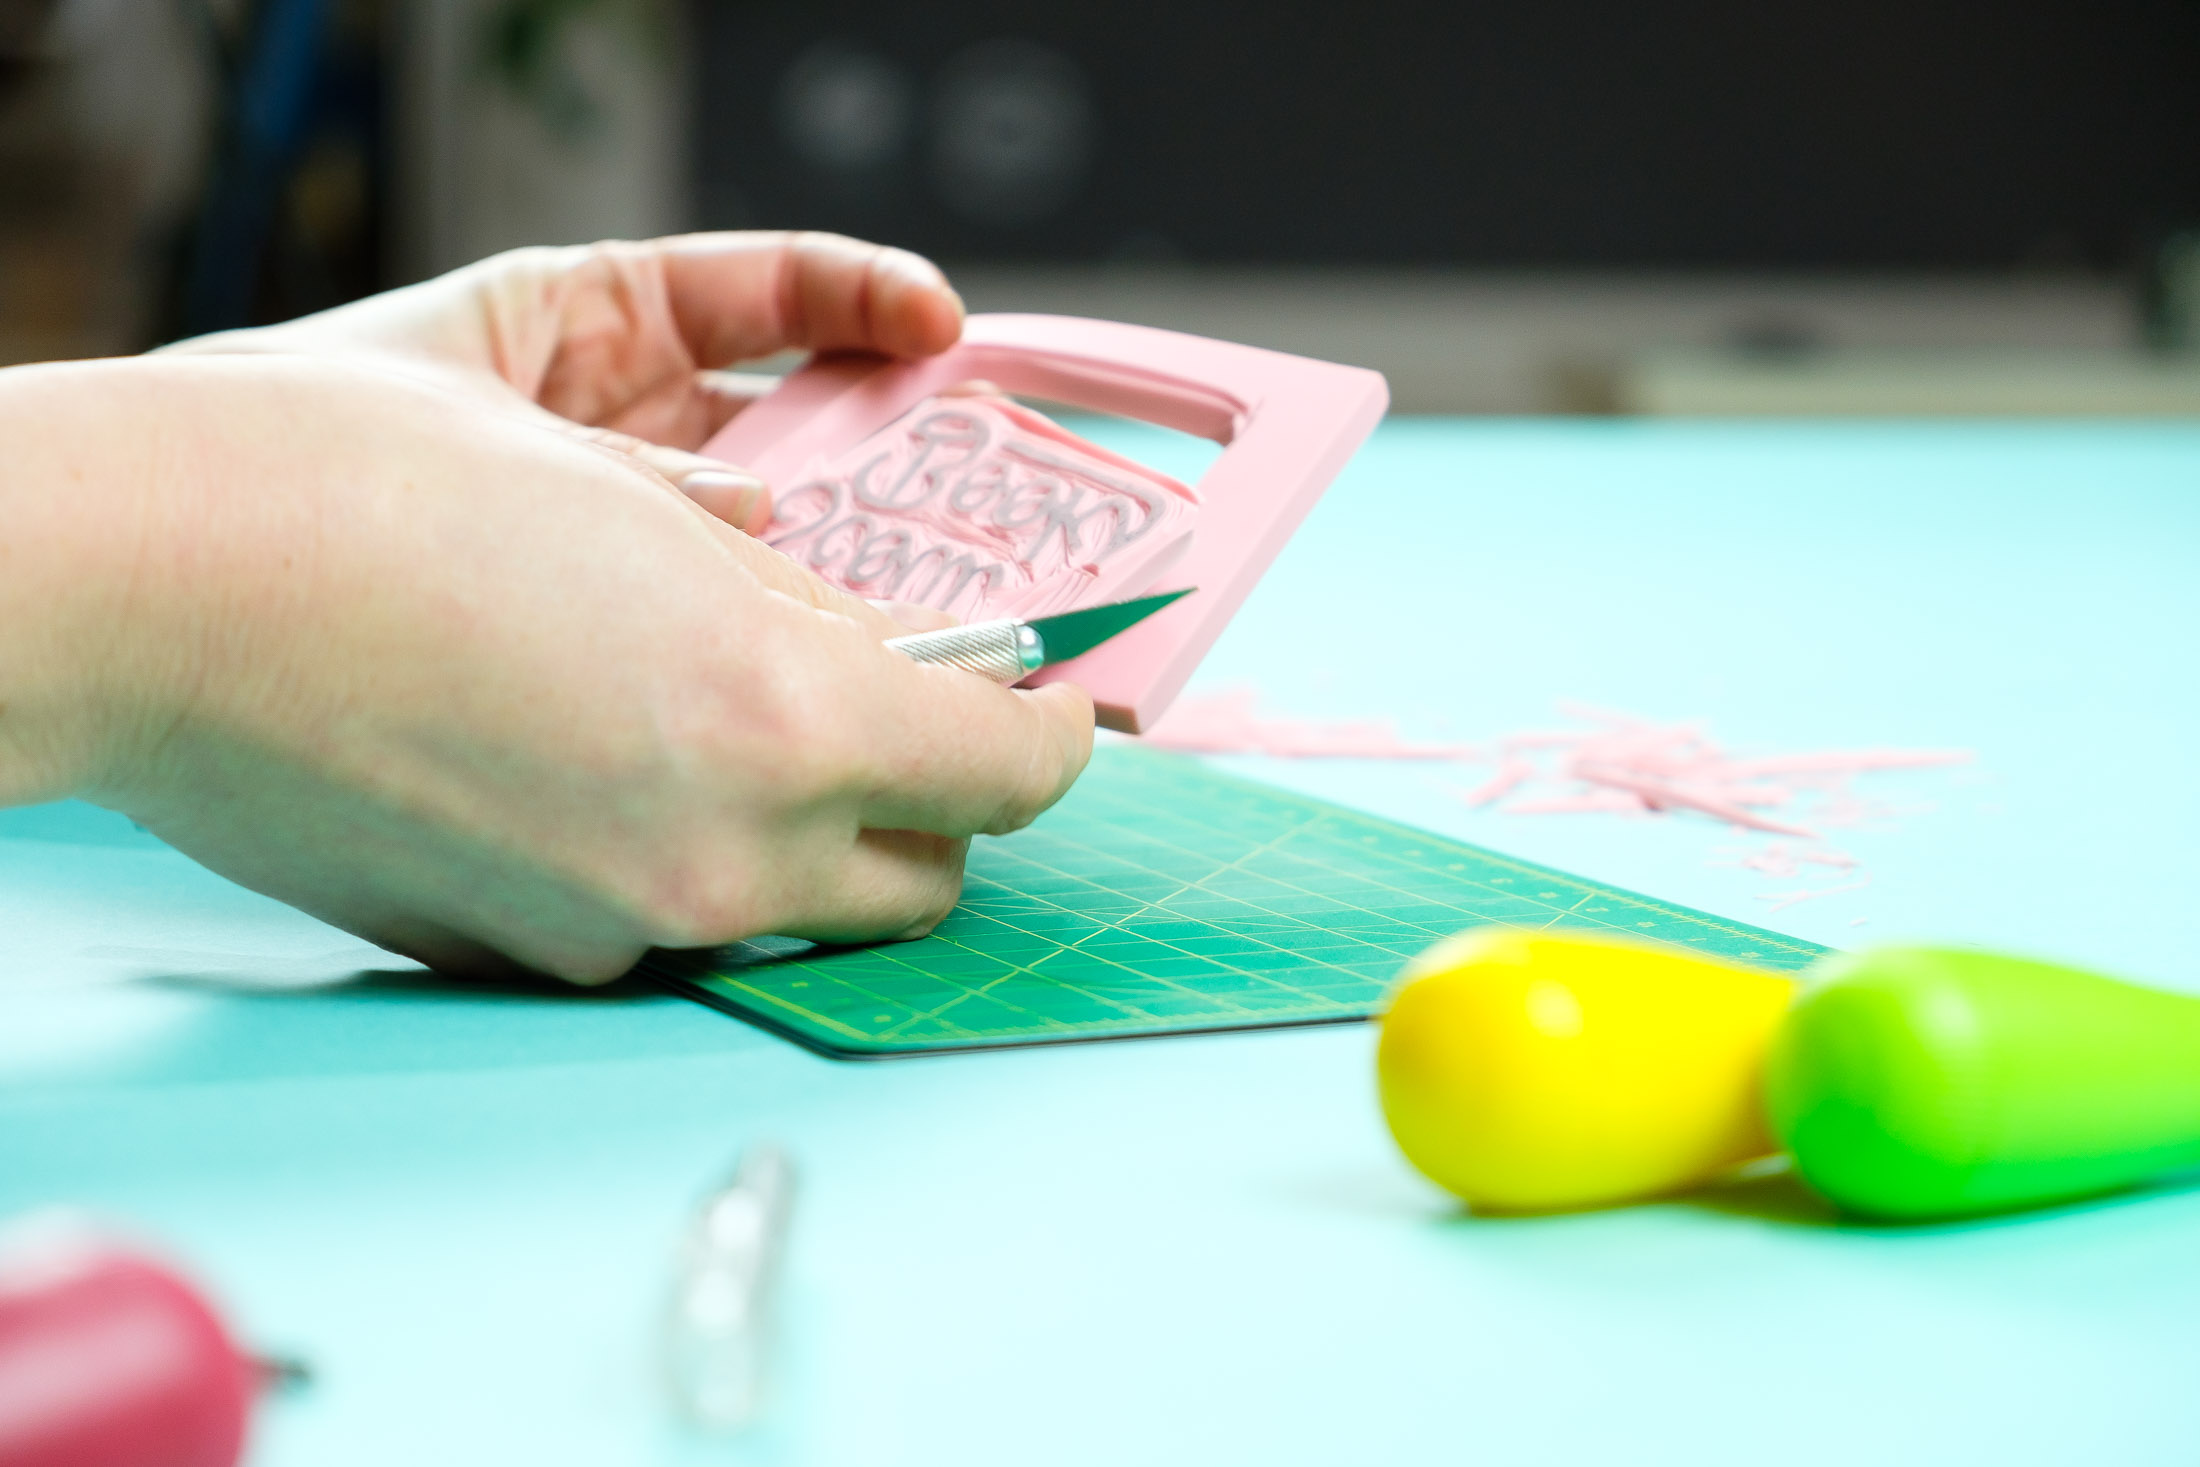
After you’ve cleared away much of the background, you can use scissors or a knife to cut out the shape of your stamp. This keeps any excess material from getting ink on your material. If you’re crafty, you can make smaller stamps with what you cut off!
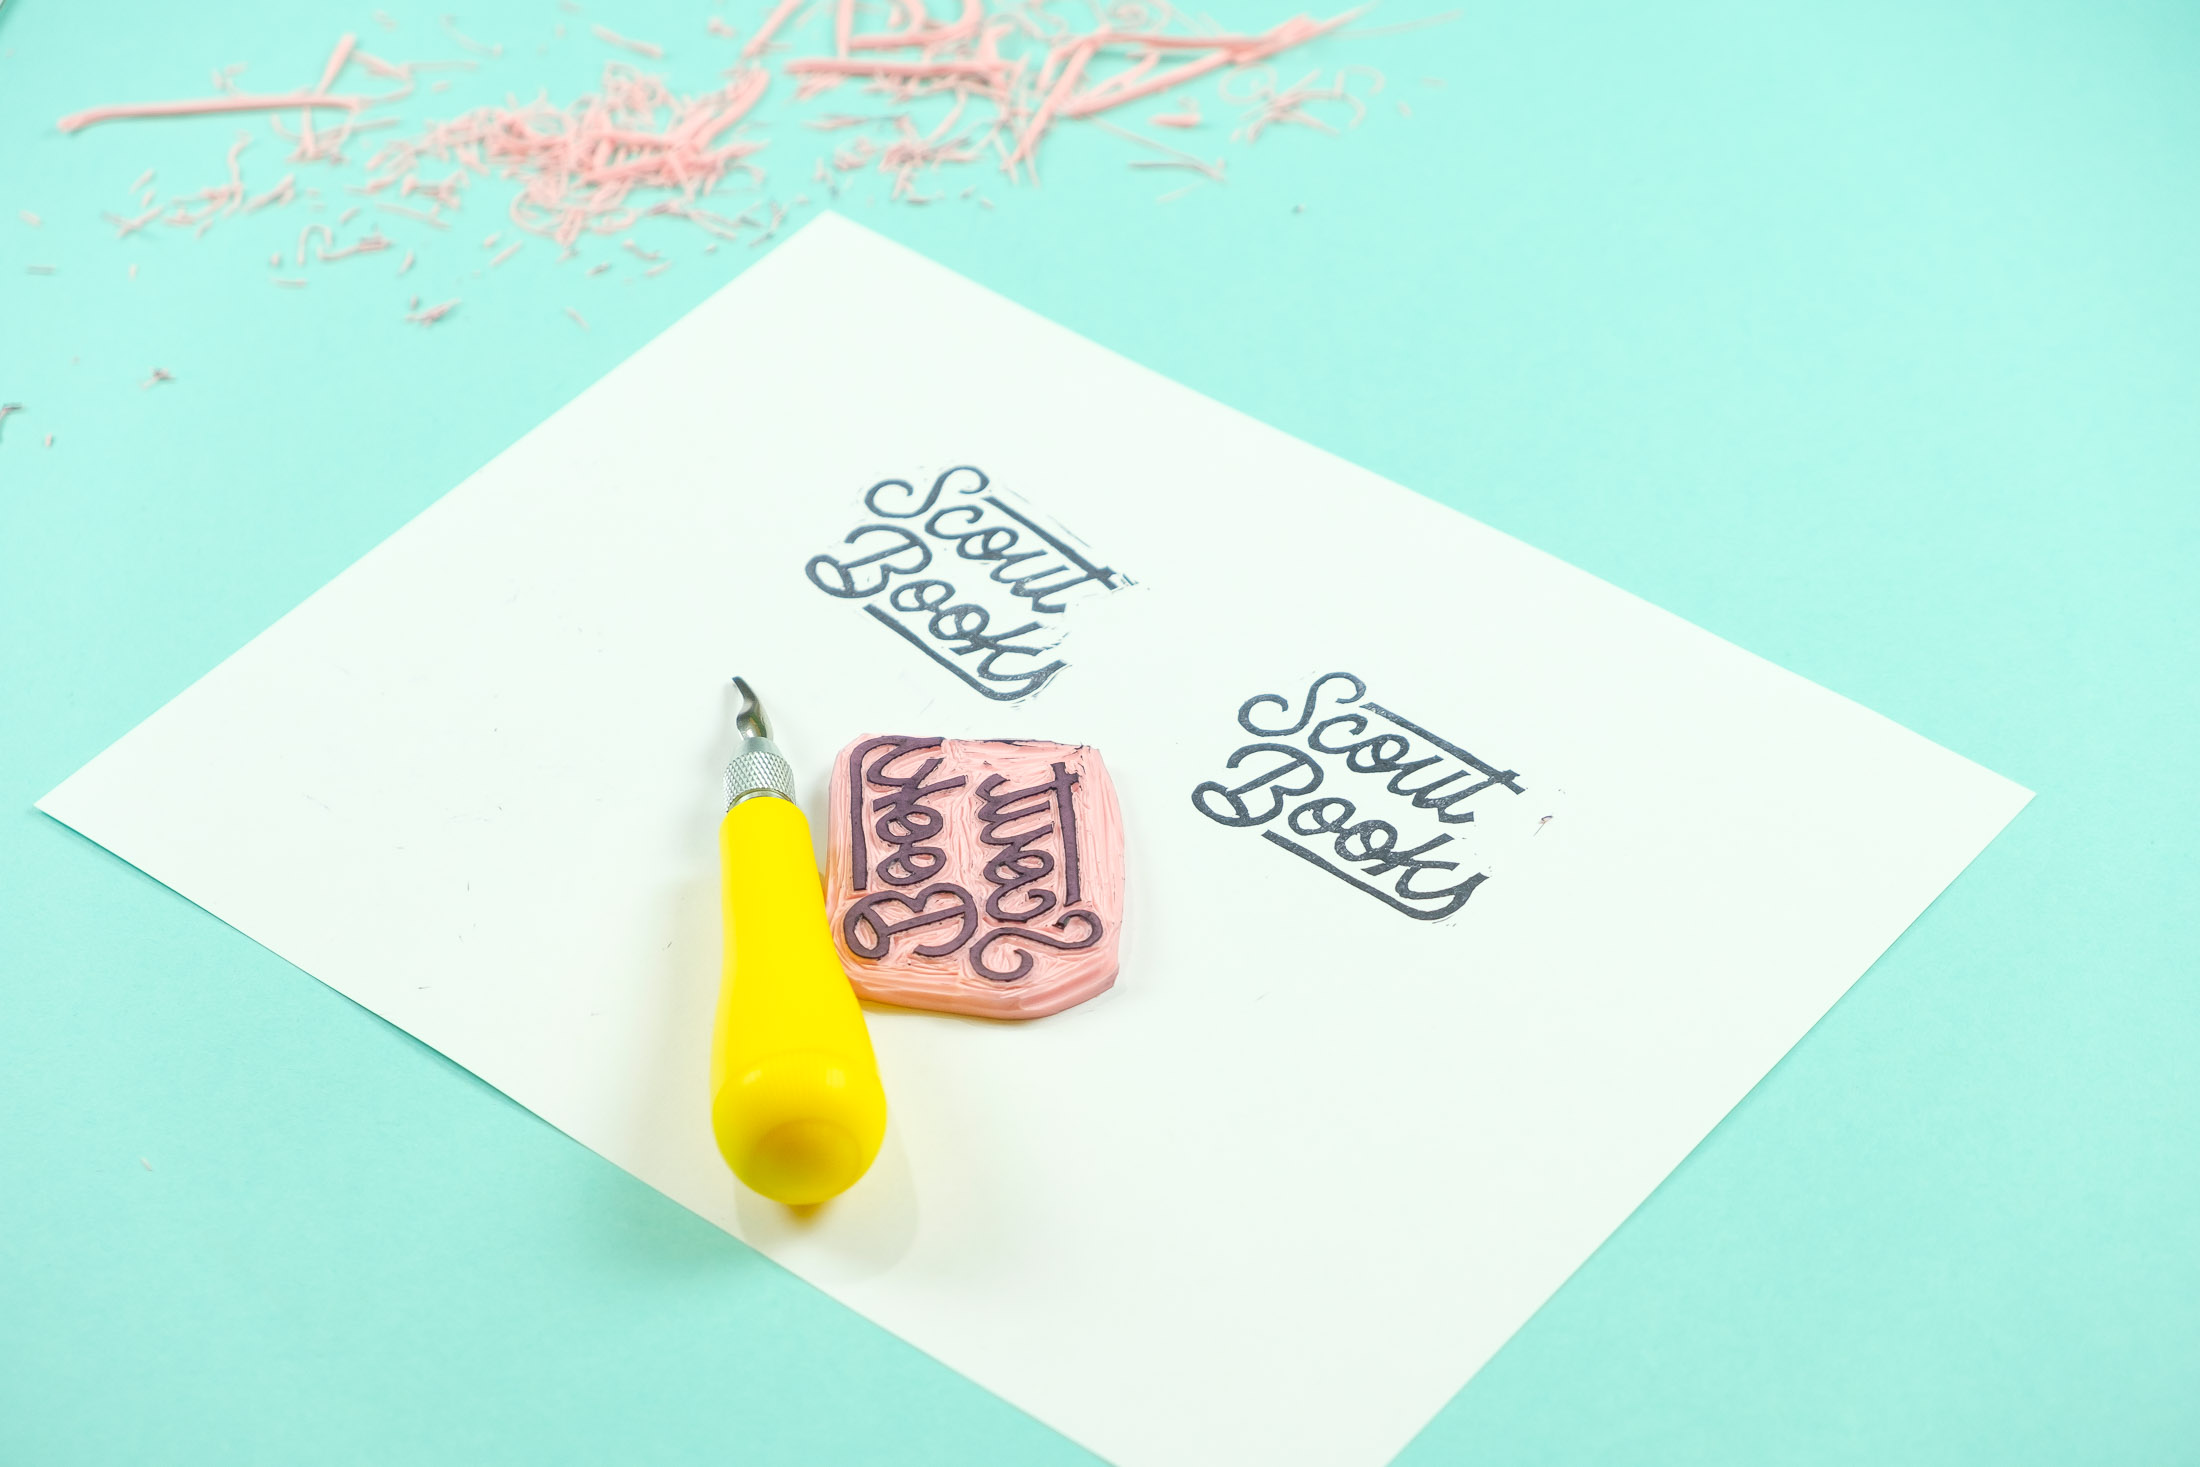
Now it’s time for your first test images. Testing at this stage is important, because there may still that will show up in your image that you’ll need to cut away. If you’re using an ink roller, squeeze out a thick line up ink and roller the roller over that until it has a heavy coverage of ink. Then roll that across your stamp so it’s evenly covered. We’re using an ink pad, so we will just need to make sure all our stamp is covered before testing.
If you have details showing up in your stamp that you don’t want, continue cutting away any details that you don’t want showing up in your print until you’re happy with the results.
Finally, we’re ready to make our real prints! We’re using Scout Books, but you can really use almost anything to print on! Naturally, we love printing on our books. They make great keepsakes, party favors, and even branded materials for your business or event!
Let’s get to printing!
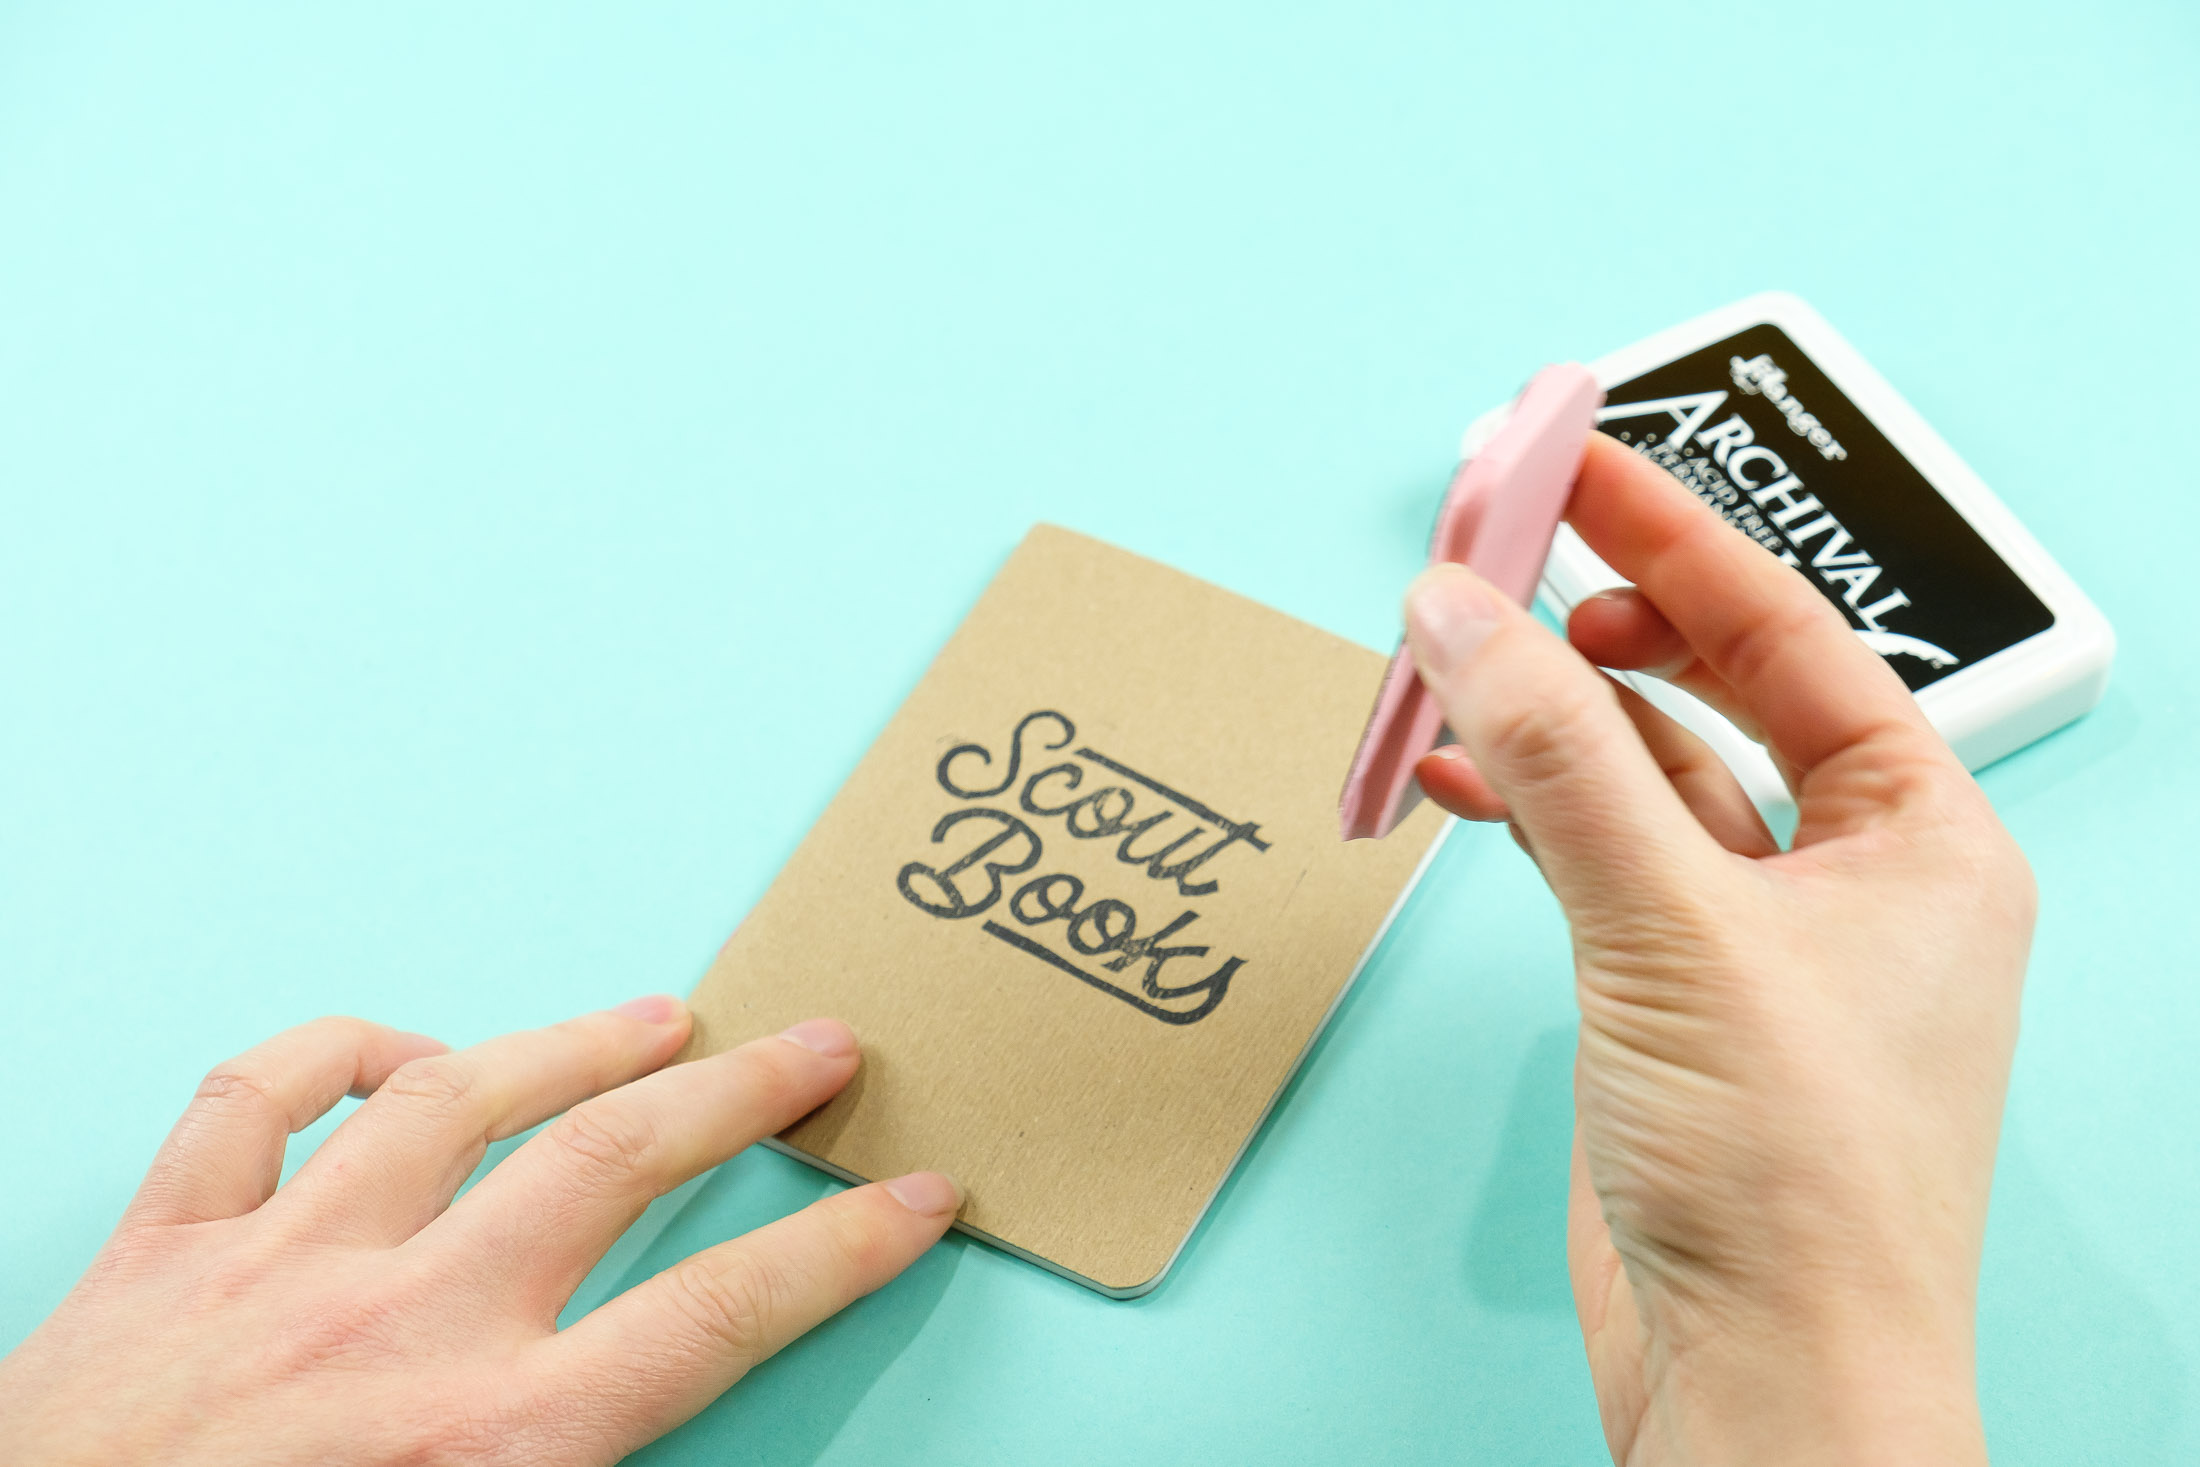
Be sure to let your ink dry before touching it! Some kinds of ink can take hours or even days to thoroughly dry, so read the instructions on whatever ink you’ve chosen.
Now you’ve made your first print! Exciting, isn’t it? We think so. We’re including some more photos of prints that our employees have worked on to get those creative juices flowing. Here are a few more examples using the methods we demonstrated above from our resident stamp maker Sonya Richards.


Please share what you make with us on Instagram and Twitter using #scoutbooks, and let us know if there are other how-to guides you want to see!
We got help from a few books in creating this guide. If you’re interested in digging in further, we recommend Print Workshop by Christine Schmidt, Making an Impression by Geninne D. Zlatkis, and Block Print by Andrea Lauren.
Originally published on December 13, 2018.